Nov 24

This is the beginning of a little standalone identity management project me and Kevin are working on for IPSwitch’s WhatsUp Gold product.

Overview:

This “WhatsUp Enterprise New User System” aka WENUS enumerates a configured LDAP Group (and any nested groups) for user accounts–any users that do not exist in the WhatsUp are created automatically.  It also reads the user account’s department attribute and creates access to the device group that has a matching device group description.  In our case we have ~200 remote sites, at each of those sites there are up to 2 techs who use WhatsUp to monitor systems at each site.  These remote sites are broken out into Device Groups, we populated all the device group description fields with the corresponding site/dept code–which is also populated in the user account’s LDAP department attribute.  This script can be run nightly or weekly to ensure the proper folks get access to only their respective area.  Furthermore it outputs to the WhatsUp System Activity Log, so you can see new users being created, and any errors there.

This was written for WhatsUp Gold v15 but should work on older versions–perhaps requiring slight modifications.

WENUS Features:

  • Enumerates a LDAP Group (and any nested groups) to create WhatsUp User Accounts when additions are made to the group
  • Scopes WhatsUp Device Group Security based on Department LDAP attribute & Matching WhatsUp Device Group Description fields
  • Outputs to the WhatsUp System Activity Log – any Creates and any Errors are logged centrally.
SQL Server credentials are required to be put into this script, to prevent this from being accessible via clear-text you can use Microsoft’s Script Encoder to encode this VBScript so Username/Password won’t be easily readable.  Download @ http://www.microsoft.com/download/en/details.aspx?displaylang=en&id=3375
This script was created to be adapted with minimal effort to other systems, feel free to let me know if you modify this to support other systems/products.
Disclaimer: Safety is not guaranteed, test this before rolling into production.

Read the rest of this entry »

Aug 18

So your trying to import a signed certificate that was created with the certificate signing request (CSR) you get an error in vCenter Orchestrator Configuration about the cert not being the correct format. If your using Microsoft Active Directory Certificate Services here are the exact steps:

  1. Export a certificate signing request from the VMware vCenter Orchestrator Configuration: Server Certificate area (goto http://vco-server:8282 then click Server Certificate on the left).  If this option isn’t displayed select the option to install a self signed certificate and then you will get the option to export a certificate signing request.
  2. Copy and paste the contents of the CSR file you downloaded from vCO Config area to your Cert Server web interface (http://CERTSERVER/certsrv).
  3. Select Web Server from the drop down and submit.
  4. Now ensure DER encoded is selected and download the certificate chain.
  5. Change the file extension on the file you just downloaded from .p7b to .csr
  6. You should now be able to upload it immediately using the “Import certificate signing request signed by CA” option inside the VMware vCenter Orchestrator Configuration: Server Certificate area (again goto http://vco-server:8282 and select Server Certificate on the left)
  7. You get a green bubble by Server Certificate and everything is happy.
Feb 12
So now that your cranking using LikeWise, you want to use it for all your admins and you need to give them access to sudo all.
Run visudo as normal:
sudo visudo
Then add a line at the bottom like so: (remember to press I to switch to edit mode so you can add this)
%DOMAIN\\linux^admins ALL=(ALL) ALL

When your done hit escape then type:

:wq

This will write the file out and exit visudo

Some things to note:

  • The % MUST be the first character on the line
  • Escape the slash between domain & user with a slash (double slash)
  • Use ^ in place of spaces
  • Obviously replace DOMAIN with your domain
  • If you have problems try dropping case on the group name
Dec 11
SpeedTest.net DOCSIS 3.0
icon1 Michael Requeny | icon2 Uncatagorized | icon4 12 11th, 2010| icon3No Comments »

Swapped out my DOCSIS 2.0 for a 3.0 and very happy with the difference I am seeing, this is the same service I’ve always been paying for…

For comparison here is a previous test @ SpeedTest.net:

Jul 3
DHCP Pwnage v0.1
icon1 Michael Requeny | icon2 Uncatagorized | icon4 07 3rd, 2010| icon31 Comment »

Ever wanted to exhaust a DHCP servers pool? (of course for testing things in a non-production environment)
I did, so I created DHCP Pwnage

This Perl script will grab as many leases as you want, you define the number of leases via the $ClientC var. I plan on writing this tool in PHP so I can add a lot more functionality.

This was created by modifying the example code of Net::DHCPClientLive, to get Net::DHCPClientLive you will need to force the install or notest the install via CPAN.  I have had no luck having Net::DHCPClientLive install properly on any platform without using force or notest.

Download: dhcp-pwnage-v0.1.pl.zip

Read the rest of this entry »

Jul 2

Something cool for your ESX/ESXi labs–Rather then relying on using the VIC (VMware Infrastructure Client) to remote control your VMs you can enable VNC access to them.

To do this power off the VM and add the lines below to the VMs .vmx file, you will need to choose a different port for each VM you wish to do this on.

remotedisplay.vnc.port=”5900″

remotedisplay.vnc.enabled=”true”

If your using ESX you can password protect the VNC connection by adding this line:

remotedisplay.vnc.password = “password”

May 23
Cool function you can use on your local network to lookup a devices MAC address, (assuming the device is on your network).
For a big company, either look in the remote locations router, or your core router.  If you use this leave me a comment, would love to know how your using it.
// =============================================
// getmac(Device IP, Router, SNMP Read Community)
//  Michael Requeny — http://michael.requeny.com
// – Looks up remote devices MAC
// – SNMP to routers ARP table
// – Converts MAC from HEX to ASCII
// – Inserts : seperators
// =============================================
function getmac($ip, $router, $snmpread) {
$oid = “.1.3.6.1.2.1.3.1.1.2”;
$mac = snmprealwalk($router, $snmpread, $oid, 1000000 ,10);
// load up array keys for lookups
$keys = array_keys($mac);
foreach ($keys as $key) {
// if needle contains IP && needle = IP
// this prevents srch for 10.254.254.1 returning
// multiple values (like .1, .11, .111, etc.
if (strstr($key,$ip) == $ip) {
$mackey = $key;
}
}
$mac = trim(str_replace(‘Hex-STRING: ‘, ”, $mac));
$mac = str_replace(‘ ‘, ‘:’, $mac);
return $mac;
}
Feb 21
Card Access Complete Write-up
icon1 Michael Requeny | icon2 Uncatagorized | icon4 02 21st, 2010| icon35 Comments »

So you want to setup a card access system?  Well assuming you don’t mind being locked out of your home for a few hours here is how it’s done…

First let’s cover how they work—

There are five parts to a card access system:

  1. Control Interface
  2. Cards
  3. Readers (Either card readers, keypads, or a combination of both)
  4. Card Access Control Panel(s)
  5. Outputs (electromagnetic locks, electric strikes, contacts) Read the rest of this entry »
Jan 24

So this was a challenge–I wanted to eliminate the X10 remote and disable X10 on my INSTEON switches for the home theater.  In doing so I wanted to use the INSTEON IRLinc to convert IR signals to INSTEON.  This would allow me complete control via my Logitech Harmony Remote.

I hooked up the IRLinc and paired up my devices to Scenes A/B and everything worked fine with the IRLinc credit card remote.  To get the Harmony setup I had to add custom commands for Scene A on/off (Screen Up/Down) and Scene B on/off (Wall Scones on/off).  These had to be learned on the Harmony using the IRLinc remote when I was done I quickly discovered control from the Harmony was very unreliable.  I toyed with this for a few days on and off and eventually got fed up and tossed it in a drawer to forget about.

Last night Ken was over and I decided to have two minds look at it 😛 I knew it should work, and with a fresh pair of eyes we got it working.  We hooked it up and everything worked properly–I had previously added the INSTEON switches to the IRLinc’s scenes and it had retained those settings.  Testing it with the IRLinc’s credit card remote everything worked fine (as before) but with control via Harmony was very unreliable just as before.  We tried relearning the IR signals and that wasn’t getting us anywhere while sitting there staring at the screen we saw the “Custom” button on the IR Learn page in the Harmony software.  When we hit that we saw that all our learned commands had “Analyzed” next to them so we hit the new Learn Raw button that appeared once we hit the Custom button.  The learning process was a lot faster and we quickly updated the remote to test.  Success!  We learned that the Harmony doesn’t replicate IR codes it learns exactly.  By default the remote analyzes the IR signal and fixes any issues or interferance it encounters (sunlight in the room for example has IR light).  When the Harmony analyzed  the IRLinc’s signal it would clean the signal so much to the point that the IRLinc wasn’t able to respond because it wasn’t receiving the proper IR signal.  Hopefully this post helps others who have IRLinc’s in drawers from failed integration with Harmony remotes.

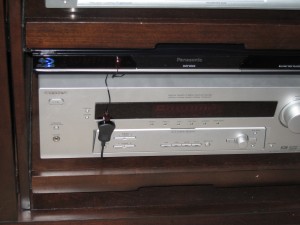
We mounted the IRLinc’s receiver on the front of my A/V receiver since I have no spare IR Emitters.  I don’t think I’ll even pickup another IR emitter for this since it’s always behind a closed door.

To get the Harmony setup I had to add custom commands for Scene A on/off (Screen Up/Down) and Scene B on/off (Wall Scones on/off).  These had to be learned via the Harmony for it to work and once learned they never worked properly.
Nov 14

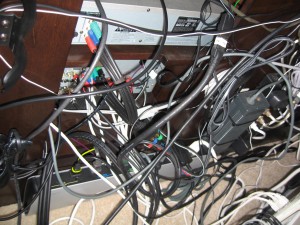
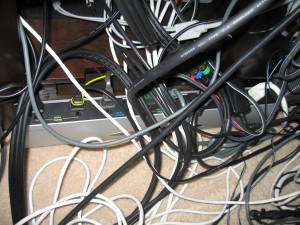
I was out of outlets so and saw an APC A/V power conditioner for super cheap–it has 10 or 12 outlets.  While I was swapping out the old strip (6 outlets) for this one I cleaned up the cables some–yes this is much much better then before.  I’ve got 0 outlets to spare.  I may have to add a second duplex outlet on the wall to accommodate my IR to Insteon device, it has a pass-through plug but I don’t trust running much through it and it takes up an entire duplex outlet–due to the APC conditioner using a low profile plug….

Power Cables:

  • Power Bridge (Feeds PJ and TV)
  • Receiver
  • DVD Player
  • Blu-Ray Player
  • Cable Box
  • Wii
  • Xbox 360
  • 2 Wiimote Chargers
  • HDMI Splitter
  • IR Connecting Block
  • Harmony Remote Charger
  • Cordless Phone Charger
  • 2 Lamps

I know it needs more work, I plan to bundle up the speaker cables, but other then that there are only a couple of other things I can think of doing to improve this.  All the power cables are bundled near the back of the respective component already…

« Previous Entries