Dell introduced this plugin awhile back, it’s actually a Virtual Appliance you import into vCenter. Â The plugin inside vCenter is actually an Adobe Flex (Flash-based) app that gets embedded into your vSphere Client, so ensure you have Flash installed on the machine(s) you wish to use this plugin from.
Overview of Features
- Update BIOS/Firmware on Dell ESXi hosts from vCenter
- Checks for updates automatically and alerts you when there are updates available
- Can leverage an established Dell Repository to avoid data duplication–if you are a heavy Dell shop you should know what this is
- New vCenter Alarms for Dell Hardware
- These Alarms can even trigger hosts to go into maintence mode to evacuate VMs from that particular host if the hardware event is critical (in a DRS enabled cluster of course)
- Supports Dell’s Proactive Systems Management
- Works without (the God-awful) SilverStreak to automatically create support cases with Dell when issues arise
- View Warranty information of your Dell hosts
- Allows you to configure a proxy, if your environment requires one
- Bare metal deployment of ESX/ESXi servers
- This leverages Dell Lifecycle Controllers and iDRACs to provision Dell servers somewhat auto-magically.
- First you create a Hardware Profile from a Reference Server–(configures boot order, BIOS settings, iDRAC settings, RAID config)
- Then you create a Hypervisor profile–You point at an ISO, and configure the vCenter, destination container (data center or cluster), and even a host profile for you enterprise plus users.
- Note you can “white-list” service tags so only those hosts you define can be used by the plugin to deploy against.
- OSMA Launcher
- So you can launch directly to your OSMA web console to connect to an OSMA agent on an ESXi host
- Appliance Upgradable
- Does not require replacement by deploying a new OVF when a new version comes out
Appliance Install Guide
Virtual Appliance Specs:
- 2 vCPU
- 3.5Gb RAM
- CentOS 5.5 based
- ~33Gb Disk Space
Installation Steps:
- Deploy OVF
- Power on (wait a bit)
- Login via the console with the username admin
- Choose new admin password
- You’ll get a menu to configure timezone, network, etc.
- Use the network menu to configure a static address
- At the top you will notice a URL for the Admin Portal, Navigate their from your browser — Note you must type the full URL including the index.html–Dell has not heard of new fangled Web Server features such as DocumentRoot 😉
- Login with your previously set admin password
- Now navigate to Appliance Management
- You’ll see 2 lines near the top, Current Virtual Appliance Version and Available Virtual Appliance Version, if the Available version is higher then the current, click Update Virtual Appliance to check for updates
- I had to do this upgrade in order to get the appliance to register with my vCenter v5

- If you did request an update, it takes about 5-10min to complete, the virtual appliance will reboot at some point, once you get a login screen at the console it should be ready to proceed
- Go back to the appliance URL in your web browser and login
- From here you’ll see a link to register with vCenter near the top–click that
- Enter the IP or Hostname for your vCenter server
- Provide User Credentials with admin access in vCenter & hit register
- Once registration is complete you will get a message to relaunch a vSphere Client and connect  to the vCenter to access the plugin, so do that.
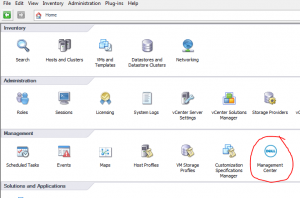
- Goto the home screen in your vCenter to click the new Dell Management Center icon
- At this point you can follow the various wizards to configure whichever features you want to take advantage of–enjoy!
Further Reading
- Dell Management Plugin for vCenter on Dell.com – Overview/Licensing/Order
- Demo Version – Upgrade to licensed version simply by uploading a license file
